
Linx – Google Drive Integration Guide
Introduction
Google Drive offers a RESTful Webservice API which allows you to create apps that leverage Google Drive cloud storage. You can develop applications that integrate with Google Drive, and create robust functionality in your application using Google Drive API.
The API enables you to:
- Download files from Google Drive and Upload files to Google Drive.
- Search for files and folders stored in Google Drive. Create complex search queries that return any of the file metadata fields in the Files resource.
- Let users share files, folders and drives to collaborate on content.
- Combine with the Google Picker API to search all files in Google Drive, then return the file name, URL, last modified date, and user.
- Create shortcuts that are external links to data stored outside of Drive, in a different data store or cloud storage system.
- Create a dedicated Drive folder to store your application’s data so that the app cannot access all the user's content stored in Google Drive. See Store application-specific data.
- Integrate with the Google Drive UI, which is Google's standard web UI you can use to interact with Drive files. To learn all that you can do with a Drive app that you integrate with the Google Drive UI, see Drive UI integration overview.
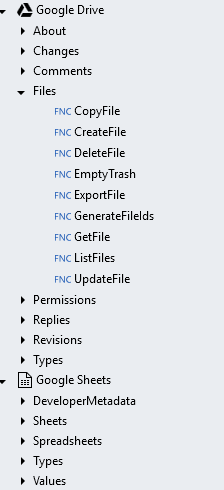
Normally, one would have to interact with the Google API via standard HTTP web service requests. However, Linx has made connecting and interacting with the Google Drive and Google Sheets API’s much easier by wrapping the most commonly used calls in their own functions:
Google API Setup
To begin your integration, you first need to register your application on the Google developer’s portal. This will allow you to generate the necessary authentication keys as well as grant the API specific access within the Google Drive instances.
For this specific guide, the authentication method followed is registering a service account and its associated authorization credentials.
The following steps are required to configure the initial API setup:
- Register as a developer
- Register your Application/Project and Enable API scope
- Download Authorization Credentials
- Connect your Linx application
1. Register as a developer
In order for you to interact with the Google Drive API you must first register as a developer. This will give you access to the Google Developer Console which allows you to configure numerous components related to app development and integration.
To register, go to the Google Developer Console.
2. Register your Project/Application and Enable API Scope
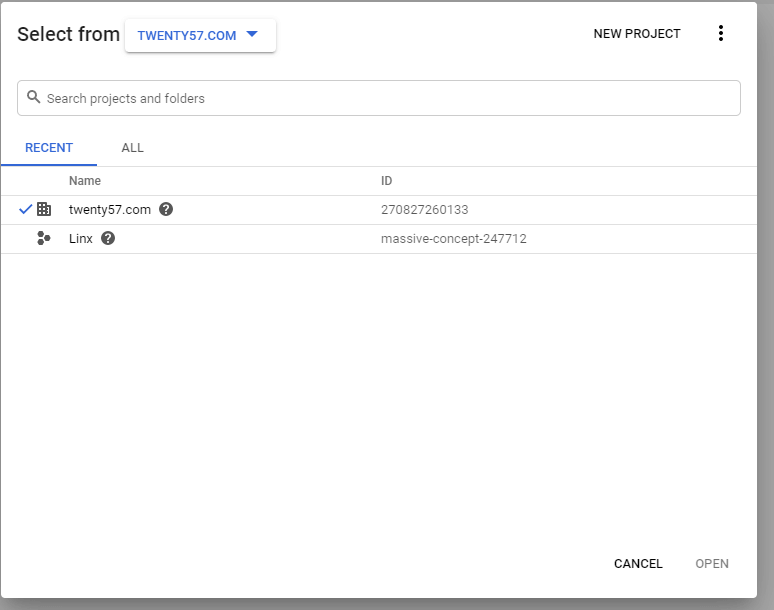
Once logged in to the Google Developer Console, you should see the API Console Dashboard. On the Menu bar you should see the option to select an organisation.
When you click on the down arrow, you will be presented with a list of organisations and projects:
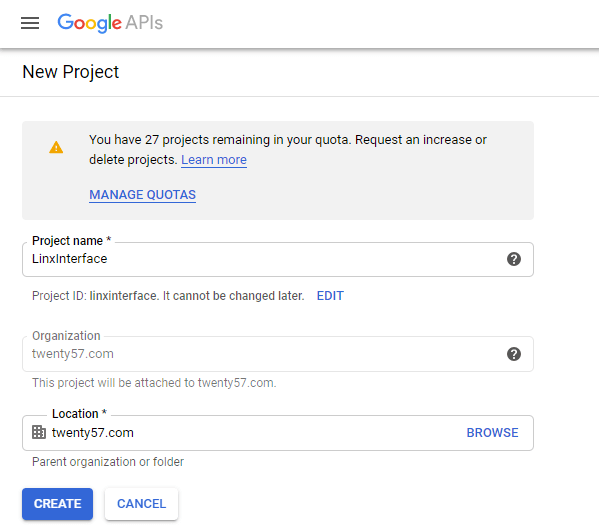
Once your organisation is selected, click on ‘NEW PROJECT’. For this sample, you are going to create a new Project named ‘LinxInterface’.
Now you have created your project, make sure it is selected as the current project next to the main menu.

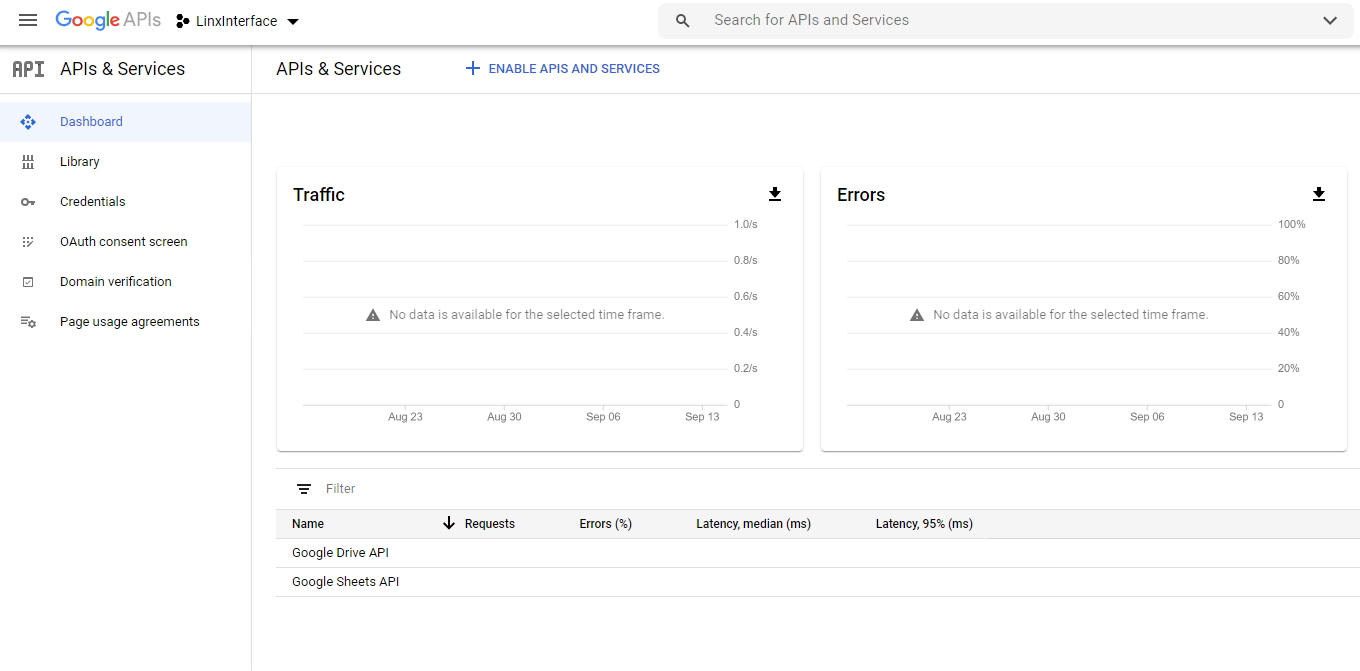
Next, you need to enable the relevant APIs for your Project. On your dashboard you should see the following screen:
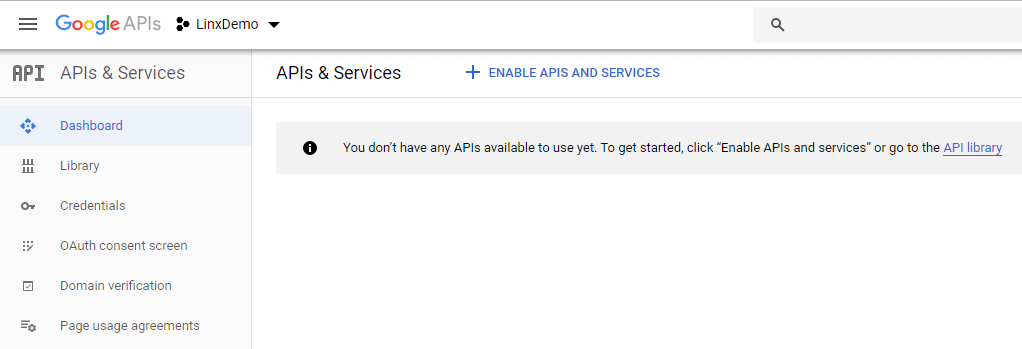
Click on the + Enable APIS AND SERVICES button to be redirected to the API Library page.
The API Library contains all the possible Google APIs that you can enable for your application.
For the scope of this sample you will be using:
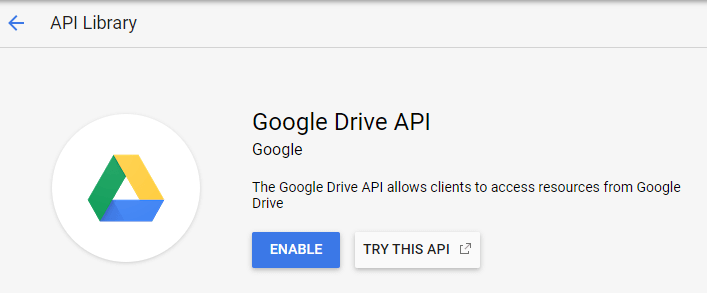
- Google Drive API: Allows access to resources from Google Drive
- Google Sheets API: Gives apps full control over the content and appearance of spreadsheet data
Search for each of the above and click on the relevant API, then “enable” the relevant APIs:
You should then see a list of the currently linked Google APIs, similar to this:
3. Create and export API credentials
In order to create a secure connection between your application and Google Drive, you need to generate the necessary authentication keys which is a once off process.
To generate these keys, click on ‘Credentials’, listed in the menu on the left of the screen.
Next, click on the ‘+ Create Credentials’ option at the top of the screen:
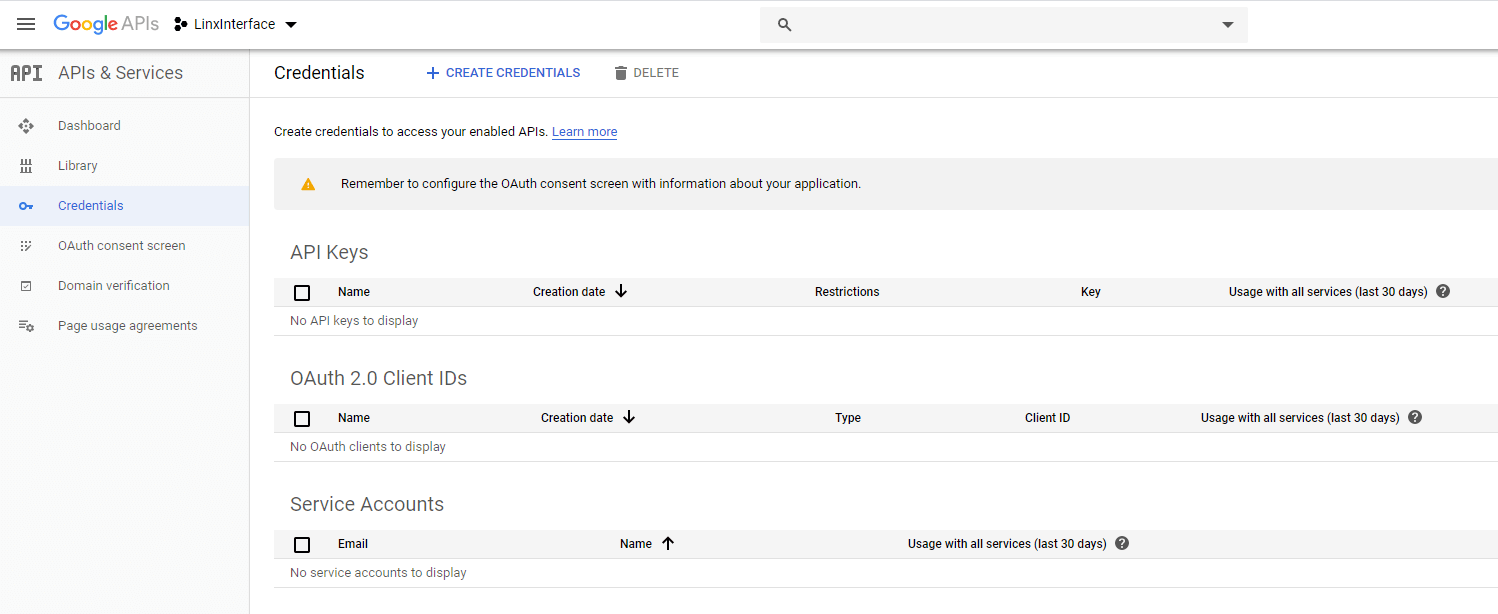
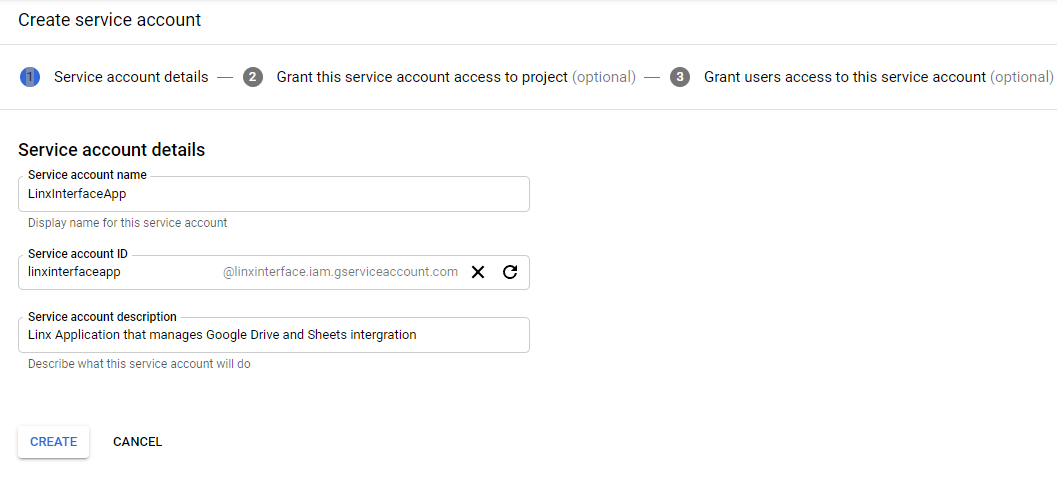
For the Linx Application, you are going to create a Service account which will provide you with the necessary authentication keys, so select ‘Service account’.
Fill in the necessary details and click ‘Create’.
Next, grant the relevant permissions. In this case the Role will be Project - ‘Owner’ which has full scope access:
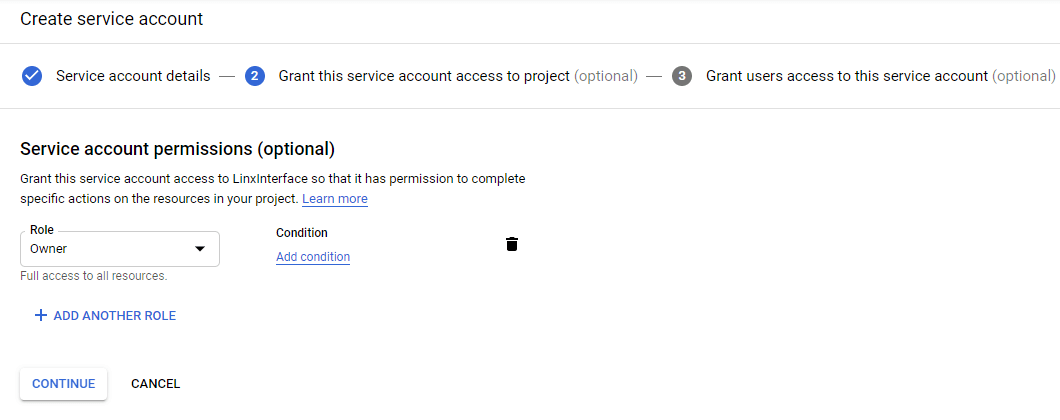
Click ‘Continue’.
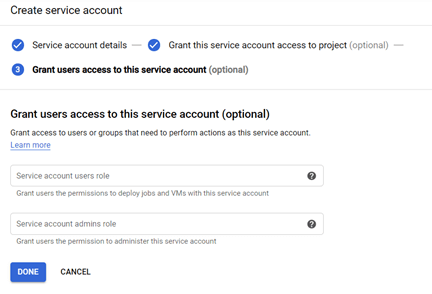
Click ‘Done’.

Click ‘Manage service accounts’.
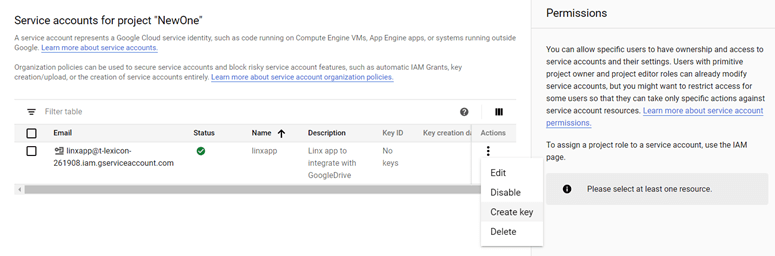
Click on the Actions icon, then click on ‘Create key’.
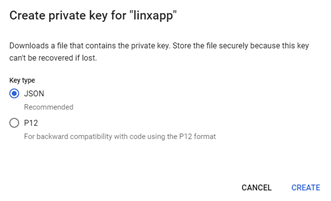
Select Key type – ‘JSON’, then click ‘Create’.
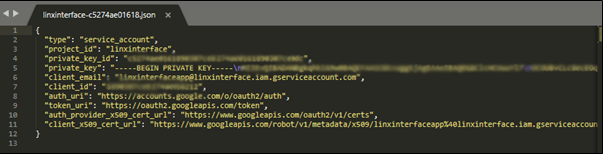
This will now export the credentials in a JSON file; save this file in a secure location for later use in Linx.
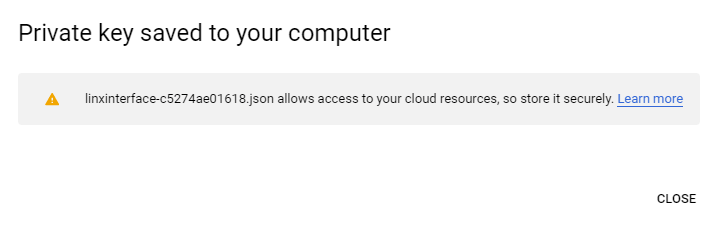
Your file should look similar to this:
Linx Application Configuration
Now that you have generated and exported the necessary authentication keys, you can now configure your Linx application to connect to the various Google APIs.
1. Open Linx sample Solution
In the Linx Designer, create a new Solution (you can open up the provided sample Solution (‘lsoz) and use it as a reference).
2. Add Google Drive and Google Sheets Plugins
Using the ‘ADD PLUGINS’ button on the Plugins panel, add the Google Drive and Google Sheets plugins to your application:
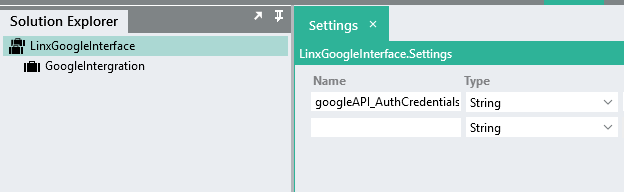
3. Configure Settings with Authentication Credentials
Create a setting value and give it a name of ‘googleAPI_AuthCredentials’:
Now copy all of the text from the exported file and paste it in the setting value:
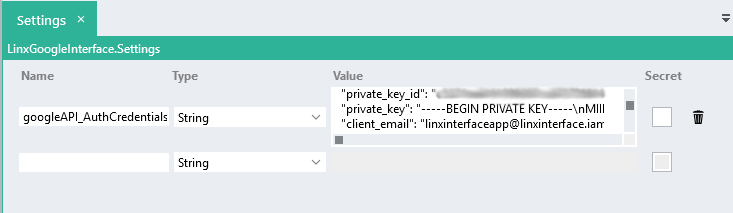
You will probably see some validation errors at this point. Please continue reading for an explanation on how to address those.
4. Test Google API Connection
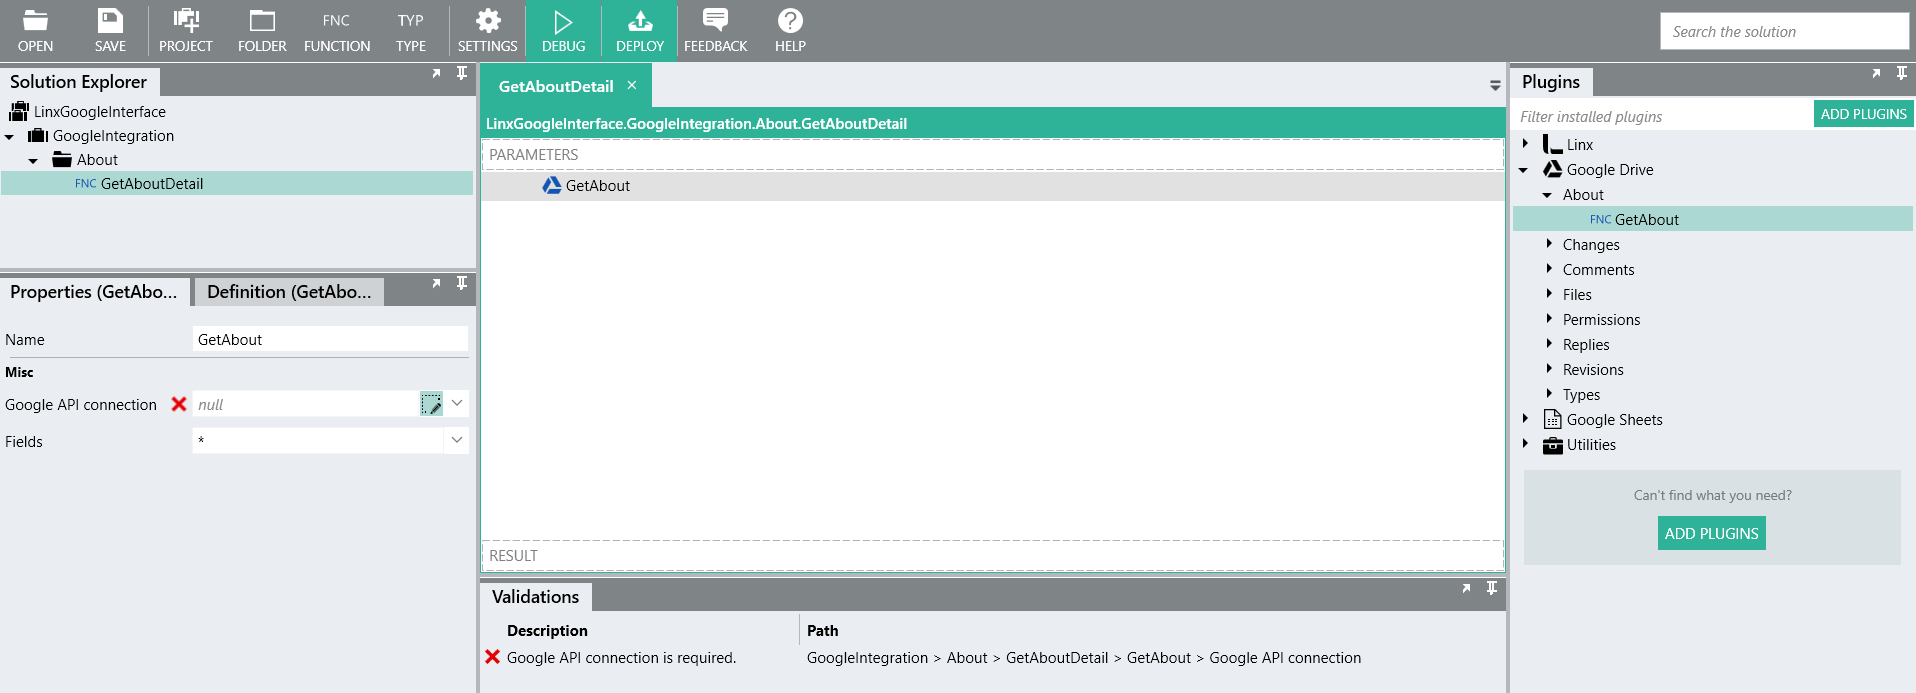
To test the connection, in a new Function, drag and drop the ‘GetAbout’ function from the Plugins panel (Google Drive – About – GetAbout).
You will notice a validation error indicating that the Google API connection property hasn’t been configured:
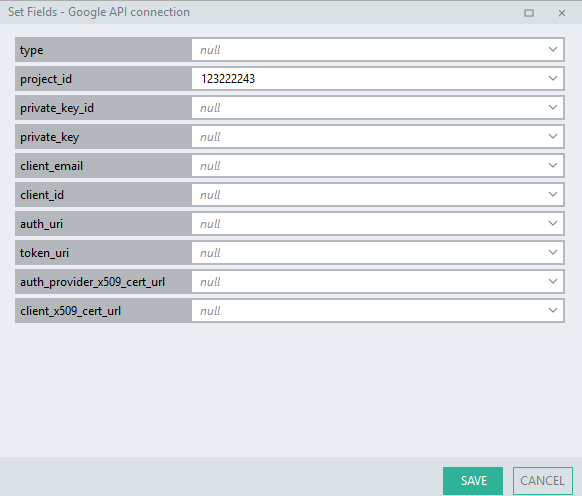
To configure this property, instead of completing each of the connection properties one by one, like this:
... you can simply assign the whole connection property to the Setting value you added earlier:
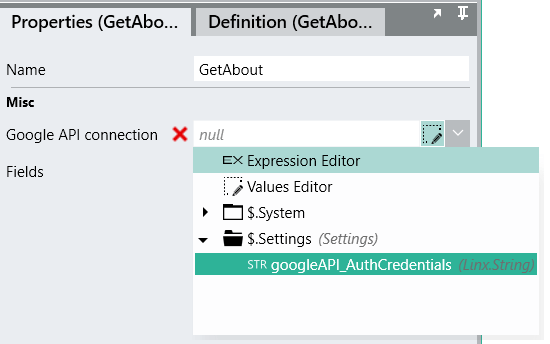
In the future, whenever you need to make use of a Linx Google Drive or Google Sheets plugin, for the API connection you can just simply reference this setting value.
Now, you are going to debug your Function to check if the authentication keys are working; to do so click on the Debug button, then the Start button.
Once your debug has completed you should see the following debug output:
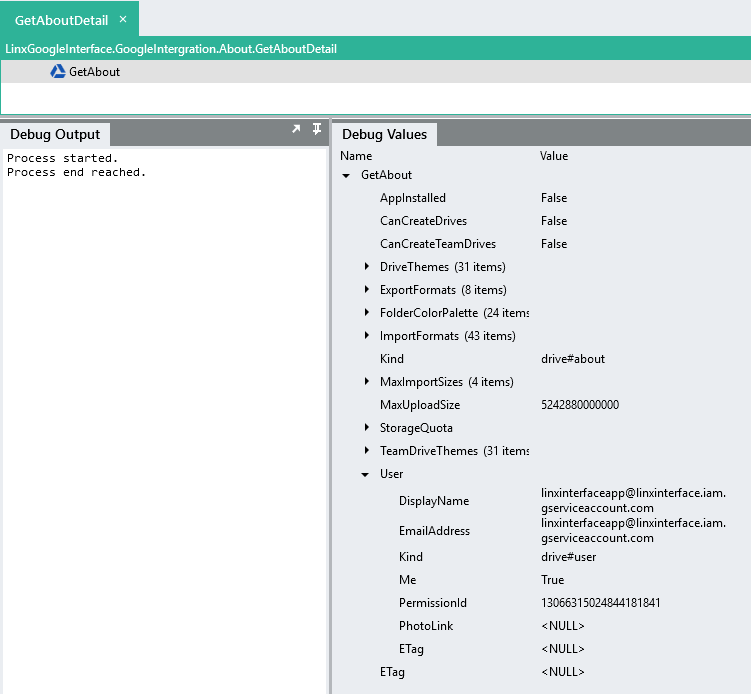
If you are seeing this then it means your Linx Application is now set up to interact with the Google Drive and Sheets API.
If you need more assistance with integrating Linx and Google APIs, please contact support@linx.software.
Sample
If you take a look at the provided sample application there are a number of sample Functions or recipes/templates that should give you an idea of how to interact with the Google API using Linx. These Functions touch on some of the main API functionality as well as extended functionality that can be accomplished with Linx.
Below is a description of each of the provided sample Functions to give you a high-level idea. It is suggested that you tinker and play around with the application to fully understand the process yourself. Once you have an idea of the basic structure, you can easily replicate and extend the API functionality.
Important:
These Functions cannot be guaranteed to work in production and as such you should do thorough testing before implementing them.
You may experience the “error” whereby you are unable to access drive items that appear on the Google Drive front-end through Linx and the API.
You may notice that the items uploaded through the API are not displaying on your Google Drive front-end, or are unable to download the files that appear. This is due to files being owned by the ‘Service account’ user you configured earlier. In order to view these files, you need to grant permissions to either yourself or the Service account user depending on whether you are viewing/creating files.
You can make use of the Linx function – ‘[Plugin] Google Drive > Permissions > CreatePermission’.
In the sample application, the user you want to share with (you), must be configured in the Linx Application setting value ‘share_with_user_email’, this will ensure that any files created are automatically shared with this email address, so that you can view them on the front end.
Function 1: Upload files from local drive to Google Drive
Function name
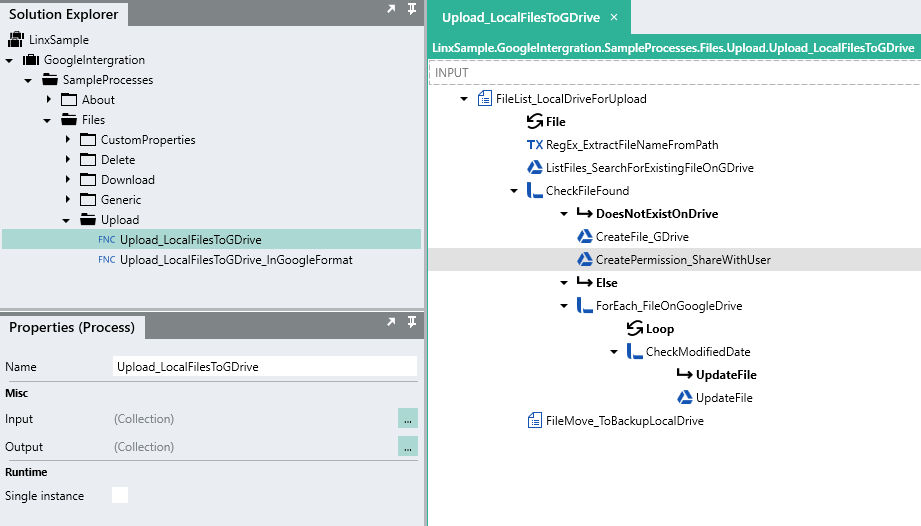
Upload_LocalFilesToGDrive
Overview
In this Function, a file list is performed on a local file directory. The directory is configured in the application’s settings value ($.Settings.uploadDirectory). When a file is picked up by Linx, it is then searched for on Google Drive.
If the file does not exist then the file is uploaded to Google Drive. Once the file has been created on the drive, a permission is created on the file to allow the sharing of the file with you. (Remember, files created using the API are under the ‘Service Account’).
If the file does already exist, a further check is done to determine if the file on the local drive has been modified after the file was initially uploaded to Google drive. If the file was indeed modified, then the file on Google drive is updated accordingly.
Once the file has been uploaded to Google drive, the file is then moved from the local directory into a “processed” directory.
To test this Function out:
- Configure the Linx Application’s Settings:
- share_with_user_email: Your email
- uploadDirectory: File path where you want files uploaded from (Default: C:/Linx/GoogleIntergration/UploadFiles/)
- Add a file to the folder configured above (create this folder if it does not exist): 
- Debug and Run your Function, stepping through each function to have a view of the data inputs and outputs.
-
Once the debug has completed you should have the following:
- Local file moved to backup location: 
- On your Google Drive, the file should be shared with you (as well as receive a sharing message): 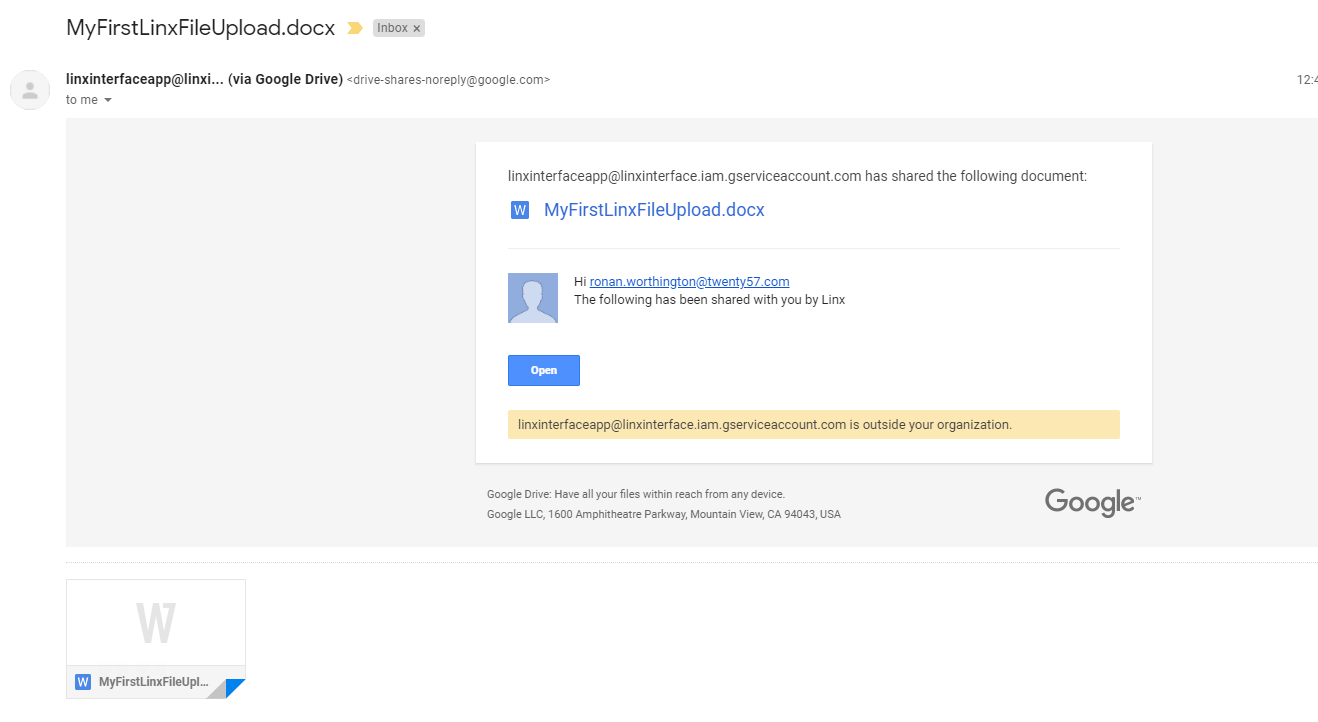
See also: Google Drive API Documentation
Function 2: Download files from Google Drive to local drive
Function name
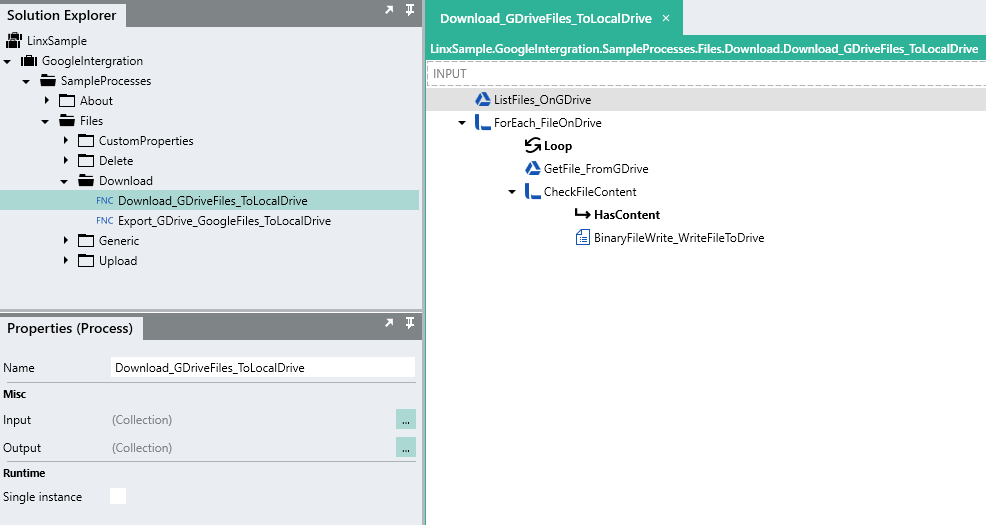
Download_GDriveFiles_ToLocalDrive
Overview
In this Function, files on Google Drive are downloaded onto your local drive.
Note: The GetFile function only applies to non-native Google Drive items like .docx, .xlsx etc, an additional q parameter is added to the request to exclude native Google Drive items.
First, a ListFiles function is performed which retrieves all the item on the drive.
Next, a loop is performed on the file list and for each file ID returned, the GetFile function is used which submits the ID as a parameter. The file metadata and contents are returned.
A BinaryFileWrite function is then used to write out the file content to your local drive.

If you want to download files from your personal GDrive using the Service Account created for Linx, then you must share the file with the Service Account: The service accounts address will be similar to XXX@XXX.iam.gserviceaccount.com.
See also: Google Drive API Documentation
Function 3: Export Google files from Google Drive to local drive
Function name
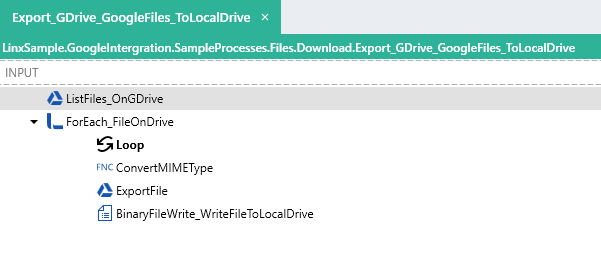
Export_GDrive_GoogleFiles_ToLocalDrive
Overview
In this Function, files on Google Drive are exported to your local drive. Note: The ExportFile function only applies to native Google Drive items Google Docs, Sheets etc.
First, a ListFiles function is performed which retrieves all the item on the drive.
Next, a loop is performed on the file list and for each file ID returned, the ExportFile function is used which submits the ID as a parameter as well as a MIME-Type to download as.
The contents are returned.
A BinaryFileWrite function is then used to write out the file content to your local drive.
See also: Google Drive API Documentation
Function 4: Add Custom Properties to a Google Drive File
Function name
GenerateAndAddCustomProperties
Overview
Custom properties which can be thought of as drive item metadata is very useful in adding additional custom “tags” to drive items, these could be individual identifiers or groups of files which you can then search for all at once using the Function. Custom properties are added in a key:value pair format.
Examples use cases of custom properties:
- Linking custom IDs to drive items in order to track files across systems eg. “CustomID”:”363637”
- Linking files by group, eg: “Department”:”Treasury”
These can then be used to retrieve groups or specific drive items in a fairy quick and straight forward way.
In the example provided, the Function works as follows:
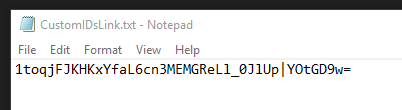
A Google Drive ListFiles is executed which returns all the FileIDs on the Drive, then, for each file a random string value is generated. This value is then used to update the file metadata with CustomID: #random string#. Once the file metadata has been updated, the FileID and CustomID are then added to a log file for record keeping purposes in the format #DriveItemID# | #CustomID#.
Function 5: Search for Files by Custom Property
Function name
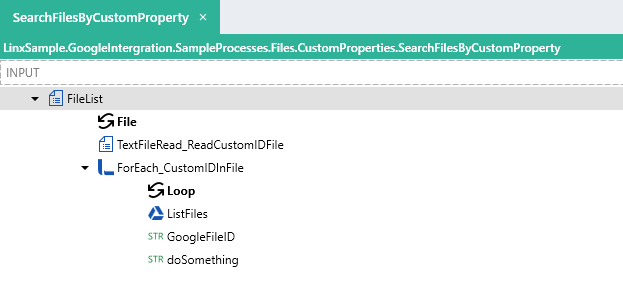
SearchFilesByCustomProperty
Overview
Now that you can link custom properties to files, you can then use these properties to search for drive items. In this Function, the file that was written in the previous Function is read, then for each CustomID in the file, a search is performed on Google Drive for items that match the CustomID value. The ID is then returned and added to a string for demonstration purposes.
Function 6: Delete files from Google Drive
Function name
DeleteFilesAndLogRecord
Overview
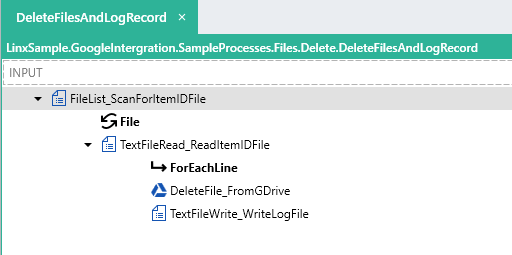
In this Function, a FileList is performed on the root file directory configured in the Linx solution, it filters for files based on the pattern ‘GoogleDriveItemIDs’, a text file containing file IDs (this could also be a Database or any function returning file ID’s), is picked up and read by Linx. For each ID within the text file, the DeleteFile function is executed which removes the file from Google drive and adds the deleted ID to a new file for record keeping purposes.
Result Log:

See also: Google Drive API Documentation
Sample on GitHub
View our sample solution on GitHub.
Useful Resources
Google API Console: https://console.developers.google.com
Google Sheet API Samples: https://developers.google.com/sheets/api/samples/
Google Drive API Samples: https://developers.google.com/drive/api/v3/reference/
Google Account Permissions: https://myaccount.google.com/u/0/permissions