Using a low-code platform as the back-end for a single page application (SPA) is an excellent combination — the SPA can be hosted anywhere, the API is quick and easy to develop, and they can evolve independently of each other e.g. if you need a native app, simply develop the UI and use the same API.
Target
Most non-trivial web applications require some user onboarding and authentication with a database to store data and a backend to do the processing. In this case, we chose a SaaS product (Xero) using OAuth2 to ensure we can handle some complexity.
The application, therefore, has the following features
-
Signup.
-
Login.
-
Logout.
-
Connect to Xero.
-
Disconnect from Xero.
Stack
- React for the front-end, as it is the most popular web framework,
- Linx for the backend, as it is the fastest way I know of to implement an API
- MS SQLServer as the database
API
This step was pretty straightforward. The most time was spent on thinking through which endpoints will be required and wrangling some finicky JSON OpenAPI3 syntax.
When you implement the API with Linx, you must create an OpenAPI3 specification as the starting point. We used a combination of Notepad++ and Swagger Editor to write and verify the schema. After much to-ing and fro-ing on whether it should be signup or register, login or sign in, recover password or forgot password, we settled on these endpoints:
-
/signup [post]. Accepts an email, first name and last name and sends and email with a unique url to the email address.
-
/confirmemail [post]. Once the user clicks on the url on the email the front-end submits the embedded unique code to this endpoint and the signup is confirmed.
-
/login [post]
-
/recoverpassword [post]. Sends an email with a unique code so a user can reset their password
-
/resetpassword [post]. Accepts the unique code and the new password
-
/user [get]
-
/xero/connect [get, post, delete]. Operations to connect to Xero
-
/xero/settings [get]
You can see the full schema here. We used a bearer security scheme using JWT tokens. It is described in the schema under components/security schemes.
Try it! Get the full sample source code
Step 1: Build the UI
There are lots of online resources available to help. We used
-
npx create-react-app: Create the basics.
-
React-bootstrap: Styling.
-
React-router: Routing.
-
Formik + Yup: Forms.
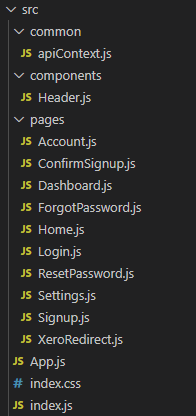
We used hooks for state and lifecycle management. They’re a relatively new addition to React but seem more straightforward to use once you understand the concepts. This enabled us to wrap the authentication and API calls in a single context object that any of the components could get to by using a useContext hook. How we organized the code.
Where to store the auth token?
In this example, it is stored in local storage. Anything in local storage is at risk of XSS attacks but weighing the risk of a successful attack and the damage an attacker can do, against the pain of setting up the infrastructure to use HTTP-only, same-site cookies (which in theory is the most secure) with a SPA is complex. In the end, the risk is very low and the possible damage is negligible, so “get-it-out-of-the-door-quickly” won.
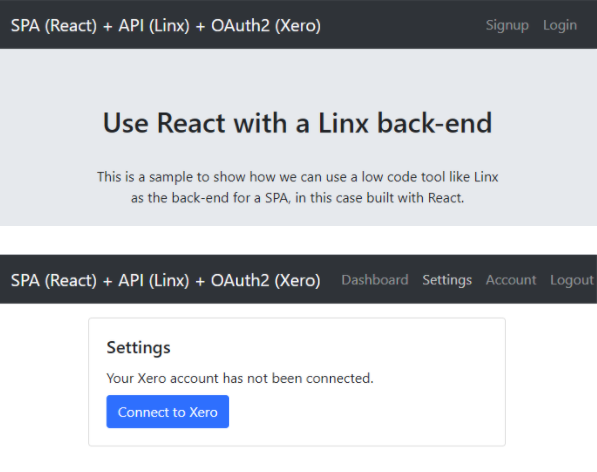
We used Visual Studio Code as the code editor. The ability to edit the code and immediately see your changes reflected in the browser makes for a very efficient workflow. The finished product looks like this:
Step 2: Design the API
This step was pretty straightforward. The most time was spent on thinking through which endpoints will be required and wrangling some finicky JSON OpenAPI3 syntax.
When implementing the API with Linx, you must create an OpenAPI3 specification as the starting point. We used a combination of Notepad++ and Swagger Editor to write and verify the schema. After much to-ing and fro-ing on whether it should be signup or register, login or sign in, recover password or forgot password, we settled on these endpoints:
-
/signup [post]. Accepts an email, first name and last name and sends and email with a unique url to the email address.
-
/confirmemail [post]. Once the user clicks on the url on the email the front-end submits the embedded unique code to this endpoint and the signup is confirmed.
-
/login [post]
-
/recoverpassword [post]. Sends an email with a unique code so a user can reset their password
-
/resetpassword [post]. Accepts the unique code and the new password
-
/user [get]
-
/xero/connect [get, post, delete]. Operations to connect to Xero
-
/xero/settings [get]
You can see the full schema here. We used a bearer security scheme using JWT tokens. It is described in the schema under components/security schemes.
Low-code API development guides
- Design-first using an OpenAPI specification
- Code-first API builder, fast implementation, including hosting and documentation
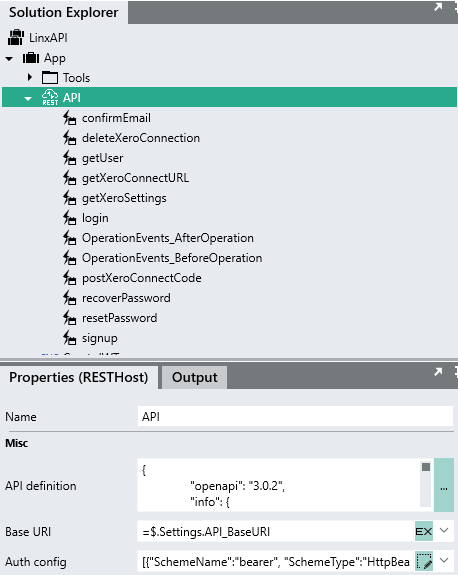
Step 3: Create the API in Linx
In Linx Designer:
-
Create a new solution.
-
Add the REST plugin.
-
Add a RESTHost service from the REST plugin to the solution.
-
Set its APIDefinition property to the OpenAPI3 schema.
-
Set the secret key in the AuthConfig property.
Linx does the rest and creates all the endpoints for you.
Step 4: Implement the API
Implementing the API with Linx doesn’t require any coding, at least not in the classic text-based programming sense. With Linx, you install the plugins you require, drop the functions in the right places, and configure the properties. It is still programming, just with more hand-holding and without the boilerplate.
We added the following plugins:
-
REST: Services and functions to host and call REST endpoints
-
Database: Functions for database access
-
Cryptography: JWT generation, encryption
-
Email: Sending the emails
-
Text: Used RegularExpression for validation.
and decided to split the solution into distinct parts for easier maintenance:
-
App: Main functionality.
-
Db: All database access.
-
Xero: All Xero interaction.
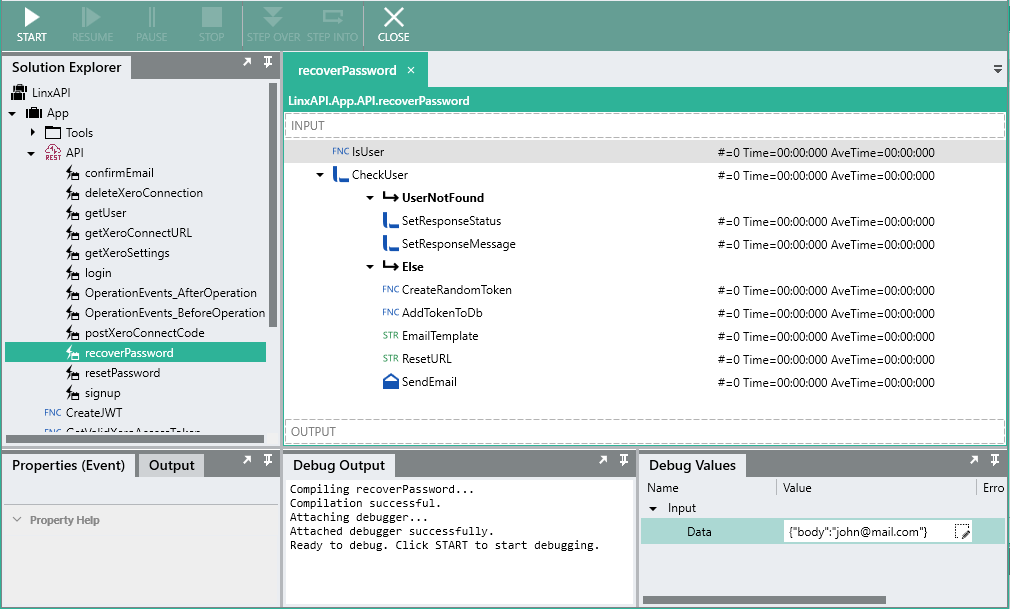
Linx made it easy to follow an iterative implementation process i.e. pick a feature, implement, test, repeat until it works. Testing early and often was the best way to limit surprises later on. This is what the debugger looks like while testing the recoverpassword endpoint:
Hosting the API
There are probably 100s of places where you can host a React SPA these days. We put this in Azure file storage and used their static website hosting to serve it. It literally took minutes.
The API went to a Linx Server. Just hit the deploy button, select your server and off it goes. The only painful bit is changing the settings for the new environment the first time it is deployed. That doesn’t sound too onerous but you’ll be surprised at how many settings a simple application like this has – at least you only have to do it once.