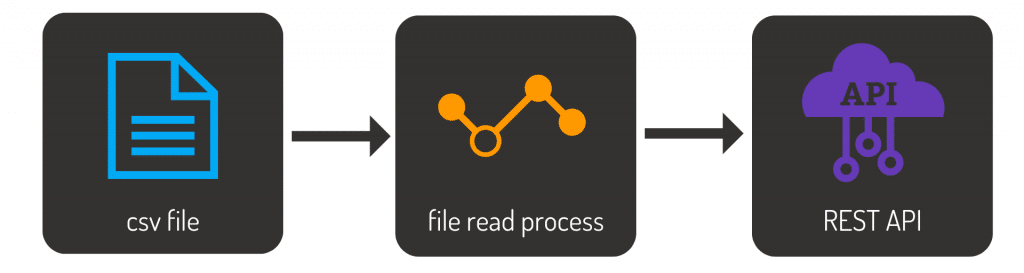
A common task for any IT department is to move data from one location to another. A simple task to do once, but if this must be done many times for many different files (each with its own metadata, file type and data structure), it is a task that can easily become tedious. In this post, we will look at a simple file import process with Linx, and we will make the data available via a REST Service.
The Specification
Before anything can be built, you need to determine what needs to be built. This is a generic solution that every IT department will be sure to come across: A simple file importer that makes the data available for consumption elsewhere (via REST API).
Creating the solution
There are three significant elements of this solution:
- A Custom Type to store our customer data
- A Function that will read the file and return a list of customers (one customer per row in the CSV file)
- A SimpleRESTHost to make the data available as a JSON object
Getting started
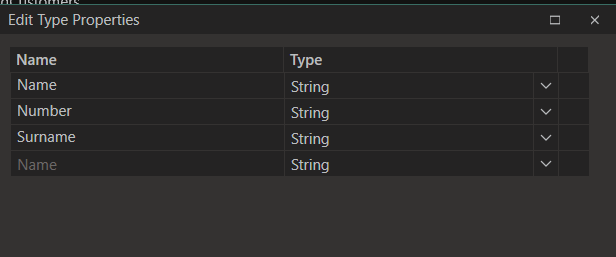
Using a CSV File from an online data generator, the sample file holds 100 records containing Name, Surname and Number fields.
To start, create a function called ‘LoadCustomers’. A personal choice is to break down each task into its own process. I want to ensure that processes are as small as possible to make future maintenance, enhancements or debugging easier. I also decided to create a custom type that will store my client’s information. Think of custom types as objects. When we create a custom-type customer, we are essentially creating an object that will contain the three fields of that customer record. These custom types are handled as JSON objects.
Loading the file
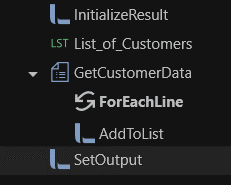
Start by adding the functionality in the LoadCustomers function to load the file. This process has its result set to be a list of customers. This means that after the process has been executed, you should be presented with a list of our 100 customer records from the file. The process follows these steps:
- Initializer the output list
- Create a separate list of customers
- Read the file
- Add the record to the list of customers
- Assign the list of customers to be the output of the process
To read the file, add the File plugin to our solution. The TextFileRead component has a great feature that allows you to load fields from the file. If your file has headers for each field, these headers can be pulled in and will be added to the field list. After setting the result of your process to be the list of customers retrieved, you now have a process that reads the file and returns our customer data.
If the file is small like our example, this does not help so much but imagine working with a file that has 52 fields! Of course, you do not have to read from a text file. You can also read from an Excel file, PDF, database, Google Drive (such as a sheet) and more. It all depends on your requirement.
Now that you have the data, you have a few options. You can either;
- read this into a database,
- reformat it,
- do calculations with it and write it back to a new file,
- create a report from the data,
- email it to a recipient,
- make the data available via an API and more.
For our example, we will make the data available via a REST API.
Making the data available via a REST Service
Linx gives you a quick and easy way to develop and host APIs. To do this, start by adding the REST plugin to the solution.
Using SimpleRESTHost
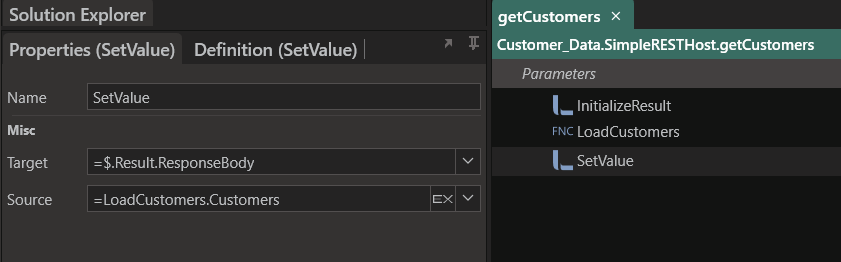
The SimpleRESTHost function allows you to create and configure REST operations quickly. The service can be added to an application by dragging the SimpleRESTHost service from the plugins panel into the Solution Explorer. This will create a base skeleton of an API and generate the API documentation for you. You can choose the documentation either be generated as either Swagger or Redocly. This documentation can be accessed by calling the service and adding either Swagger or Redocly to your Base URI. Because we already did the work of reading from the file and outputting it as a list, all we need to do now is call the LoadCustomers function and assign its output to the Response body. You can also choose to enhance your solution by adding security, error handling and logging.
Using RESTHost
If you want a bit more control and you are looking to create a Swagger file for your API, you can use a RESTHost component. This component will allow you to import the definition for the web service through a Swagger API description file.
You will need to create some settings to do so:
- BaseURI
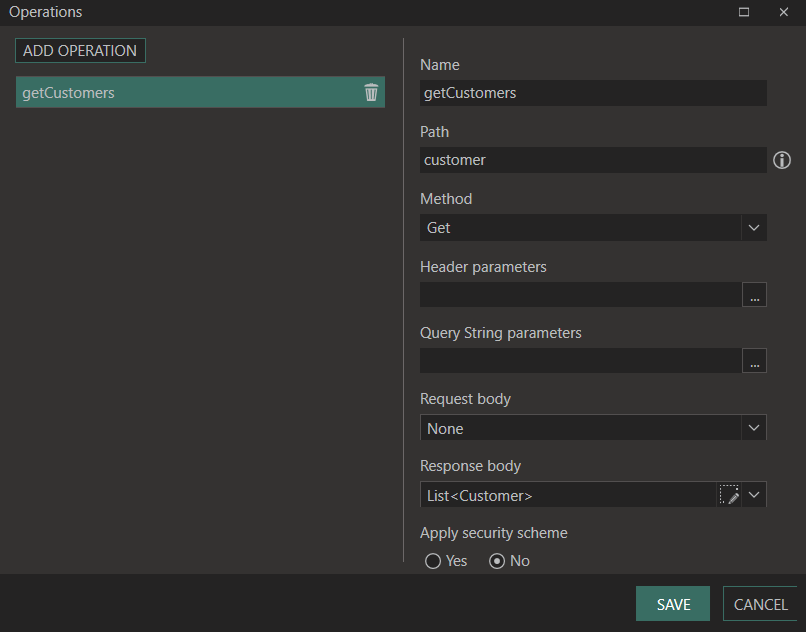
Create a Setting because it might need to change later on. Settings can be specified when the solution is hosted via the Linx Server. By doing so, you can have different BaseURIs for each environment. Whatever you choose, the value should be “http://localhost:8080/service” - Operations
Set up the operations the REST service will have, or defined otherwise, web methods. Create a customer operation that will return a list of customers in its response body and use this event to return the data in the CSV file as a JSON object.
Debugging the solution
To compile the completed solution, use the Debug option. The debugger will highlight any errors stopping the solution from being compiled. As with any good IDE, breakpoints are part of the Linx debugging process. You can add a breakpoint when in debug mode to stop the debugging process at a certain point. This is useful when you want to review the process or view what variables or outputs are at a specific time.
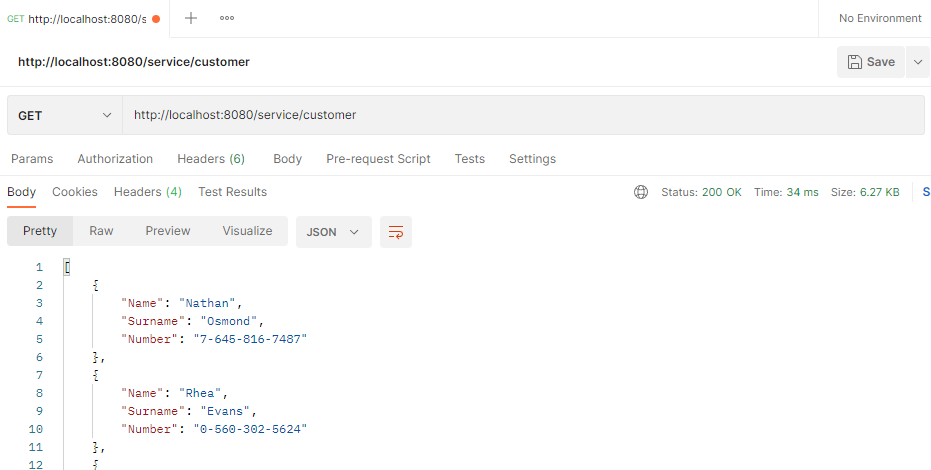
To debug the REST service as illustrated above, select the SimpleRESTHost component and click the debug button. Once started, you can call the service from a browser, or Postman, by using the BaseURI that was set and the Path of the event. For our example, we use localhost:8080/service/customer.
As a bonus, here is the output of Postman when calling the REST Service:
What to do next
When ready, the solution can be deployed to a Linx Server to run autonomously. Depending on how you create your solution, you can add other services such as a timer, directory watch (if you want to monitor a directory for an event) or more, such as
- Adding Error management
- This can be done by adding TryCatch components to catch errors
- Logging
- To log successful and error events
- To log the read data into a target data container such as a database
- Data Quality and Cleanups
- Notifications
Try it: Download the sample solution and CSV file.