Systems often need to talk to each other. You may need to access or share data, use and share functionality and integrate the two applications. Finding a connector for each individual application can be challenging. Luckily, the solution is easier than you might think.
With Linx, you can build custom connectors that suit your needs and aren’t overly complicated. You can create these connections in various ways, depending on what technology is available to you:
These can often feel like daunting tasks, but when using a low-code integration platform like Linx, you can quickly set up those connections and integrations with a high degree of flexibility.
API consumption made easy
Connectors in the form of HTTP requests wrapped in a pretty interface that handles the nuances of the different APIs, making life much easier for non-technical users. Each system will have subtle differences, but the approach is the same. Once you’ve figured out how to implement a single request to a chosen API, all the other requests you want to implement will follow the same structure in terms of authentication, URLs and data objects.
For example, we built a sample Linx Solution that integrates with the GitHub REST API. To do so, we implemented the GitHub API as custom Linx functions, which can act as a “connector” that anyone can install in their Linx Solution.
There are hundreds of APIs ready and available. You just need an easy way to call them and to interact with their data. APIs can be used to connect and integrate with:
- Salesforce
- SAP
- Sage
- Social media sites such as Facebook, Twitter and more
- Google and Google products such as Maps
- AWS
- Azure
- Most Microsoft Products
This is just a small subset of possibilities. With all of these integration opportunities at your fingertips, how do you connect with them?
Building a custom connector
The example follows this API request to the GitHub API. However, the structure for each connector is similar;
- The ‘Endpoint’ contains the particular suffix of the URL to call.
- The ‘CallRESTEndpoint’ function makes a request to the endpoint.
- And the ‘ReturnResult’ function returns the result of the HTTP request as an output of the custom Linx function.
Depending on authentication, you may need to perform additional tasks if, for example, the API uses OAuth2. This is usually just another API call using the ‘CallRESTEndpoint’ to retrieve your access token (used to allow you to make API calls)
Read more on OAuth 2 here:
Understanding the API
Before you begin, take your time to understand the details of the endpoint you are calling;
- The URL (endpoint) of the operation
- Request authentication– Request parameters (such as query values, body, etc.).
- Response data object
Navigate to the particular documentation page of the API you are calling (like this one). Depending on the documentation level, you can easily set up an HTTP request without making test calls. From the documentation, you can find the method (GET), URL to call (/user/repos), and even an example of the response body.
Configuring the REST call
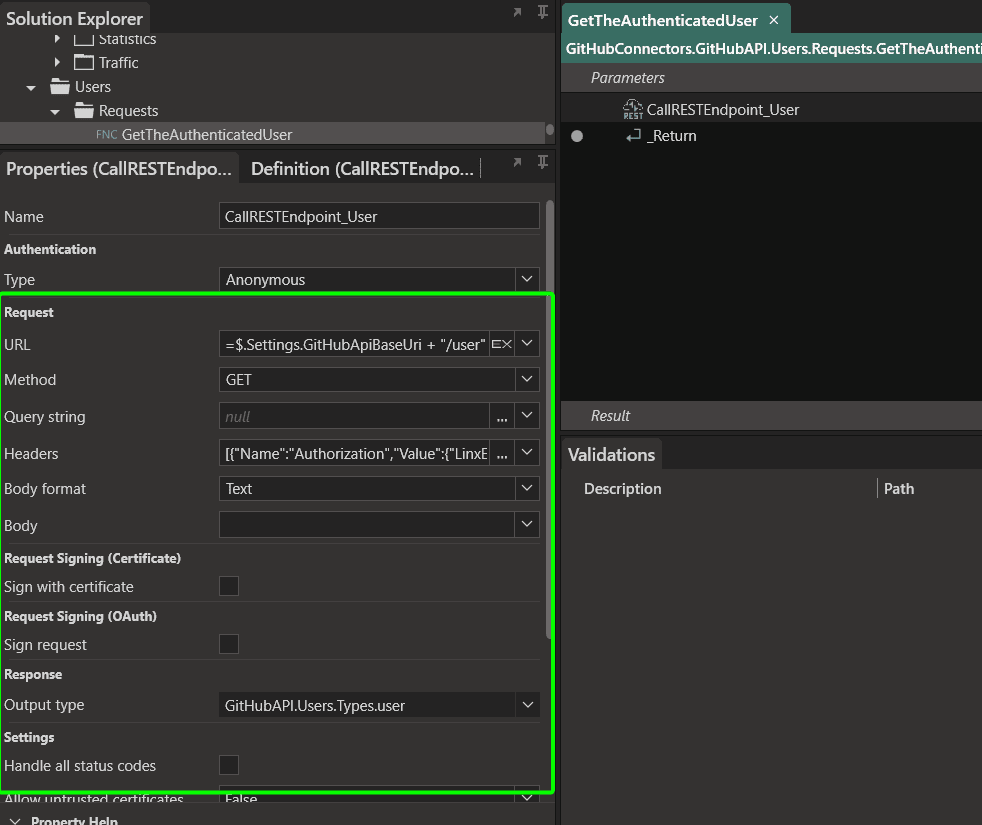
Once you understand the API, you can make the API call in Linx. This can be done by using the Call REST Endpoint function. This is part of the REST plugin.
Depending on what API and endpoint you will be calling, you will need to set up your configuration differently. Generally, you will require the following:
- URL of the endpoint
- The method (GET, POST, PUT etc.)
- Header (not always required)
- Request body
- This body can be created as a Linx Type; read more on custom types here: Working with complex data types and data objects
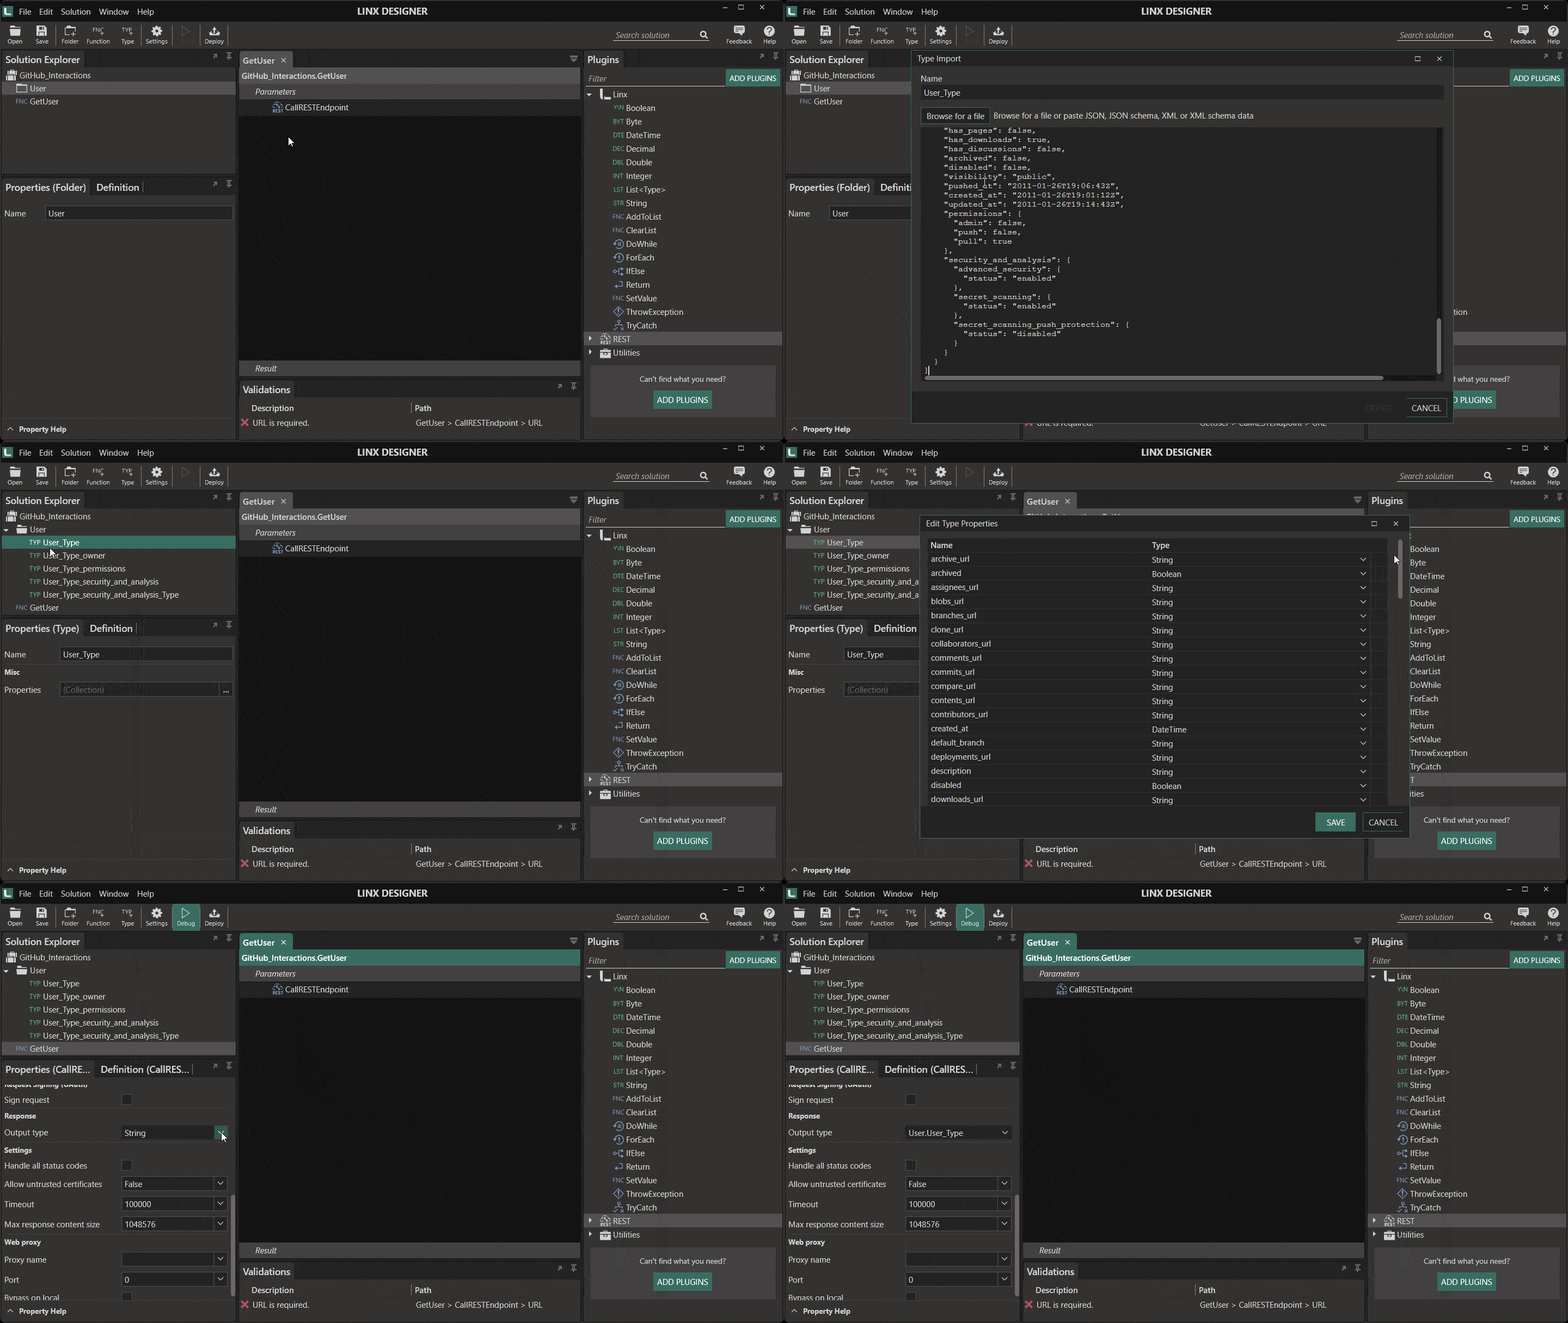
You can also create a response body data structure to make handling of the response easier and more manageable. The response body type can be imported if it is either XML or JSON. Do this by copying the JSON object or XML, then navigate to Solution > Import Type on the Menu bar. Paste the JSON or XML and give it an apt name. The new type can be selected for the response body.
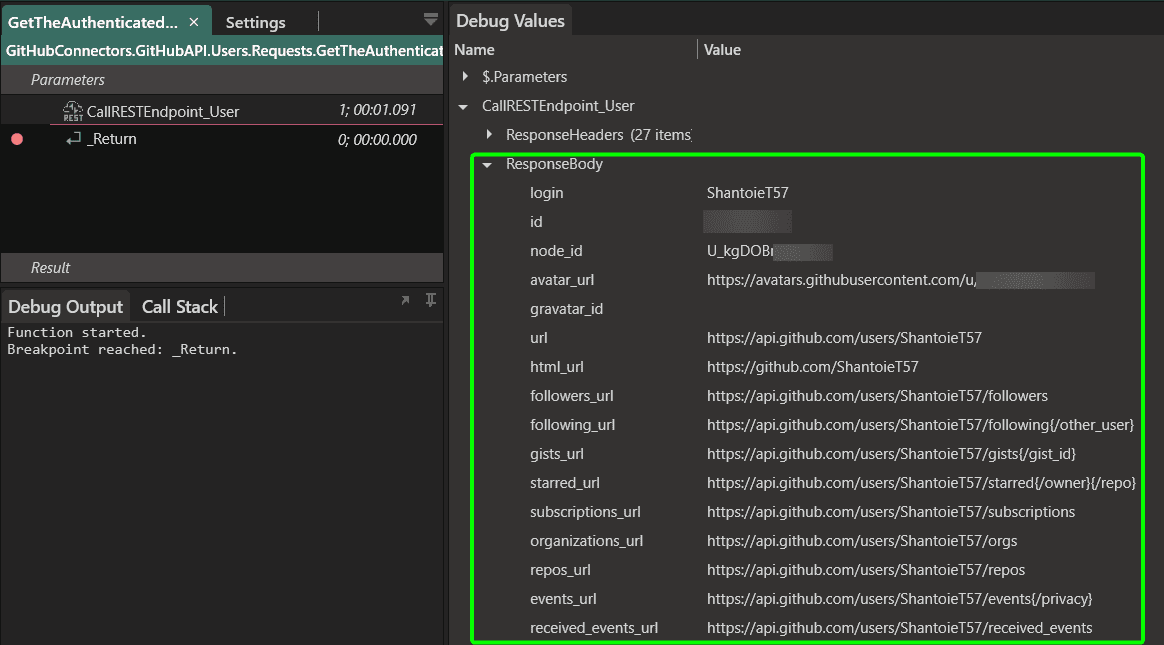
When the CallRestEndpoint function is set up, it can be executed to return the response body. For example, the list repositories for the authenticated user endpoint of the GitHub API:
Data from the API response can be used downstream. You can:
- Use the data in the response body in a next API call
- Insert the data into a database
- Create a file from the data
- Apply transformations to the data
- Make decisions based on the returned data
All this and more, depending on your requirements.
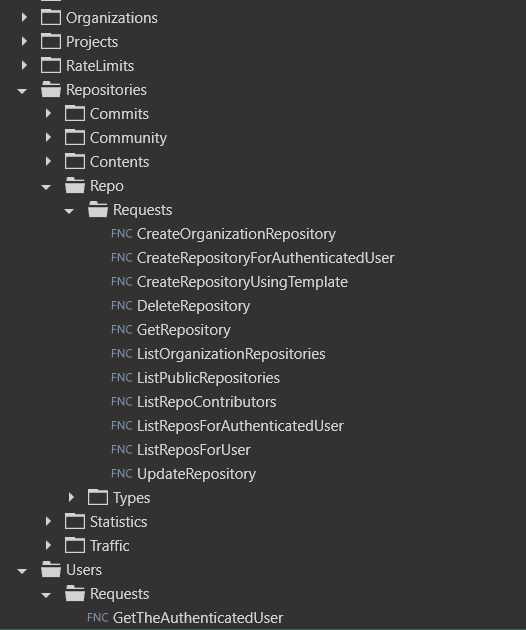
You can create a function for each endpoint you need to call. Each function can have its relevant input parameters and its own specific output. By doing this, you are creating reusable assets that can be called whenever needed elsewhere in your solution. Meaning you are creating your own connectors.
Read More on API connectors:
Connecting directly to a Database
Linx provides an easy way to connect to a database and interact with it in multiple ways, all while removing the need for complex coding. Working with databases in your Linx solutions is easy with the Linx Database plugin. The Database plugin allows you to interact with databases.
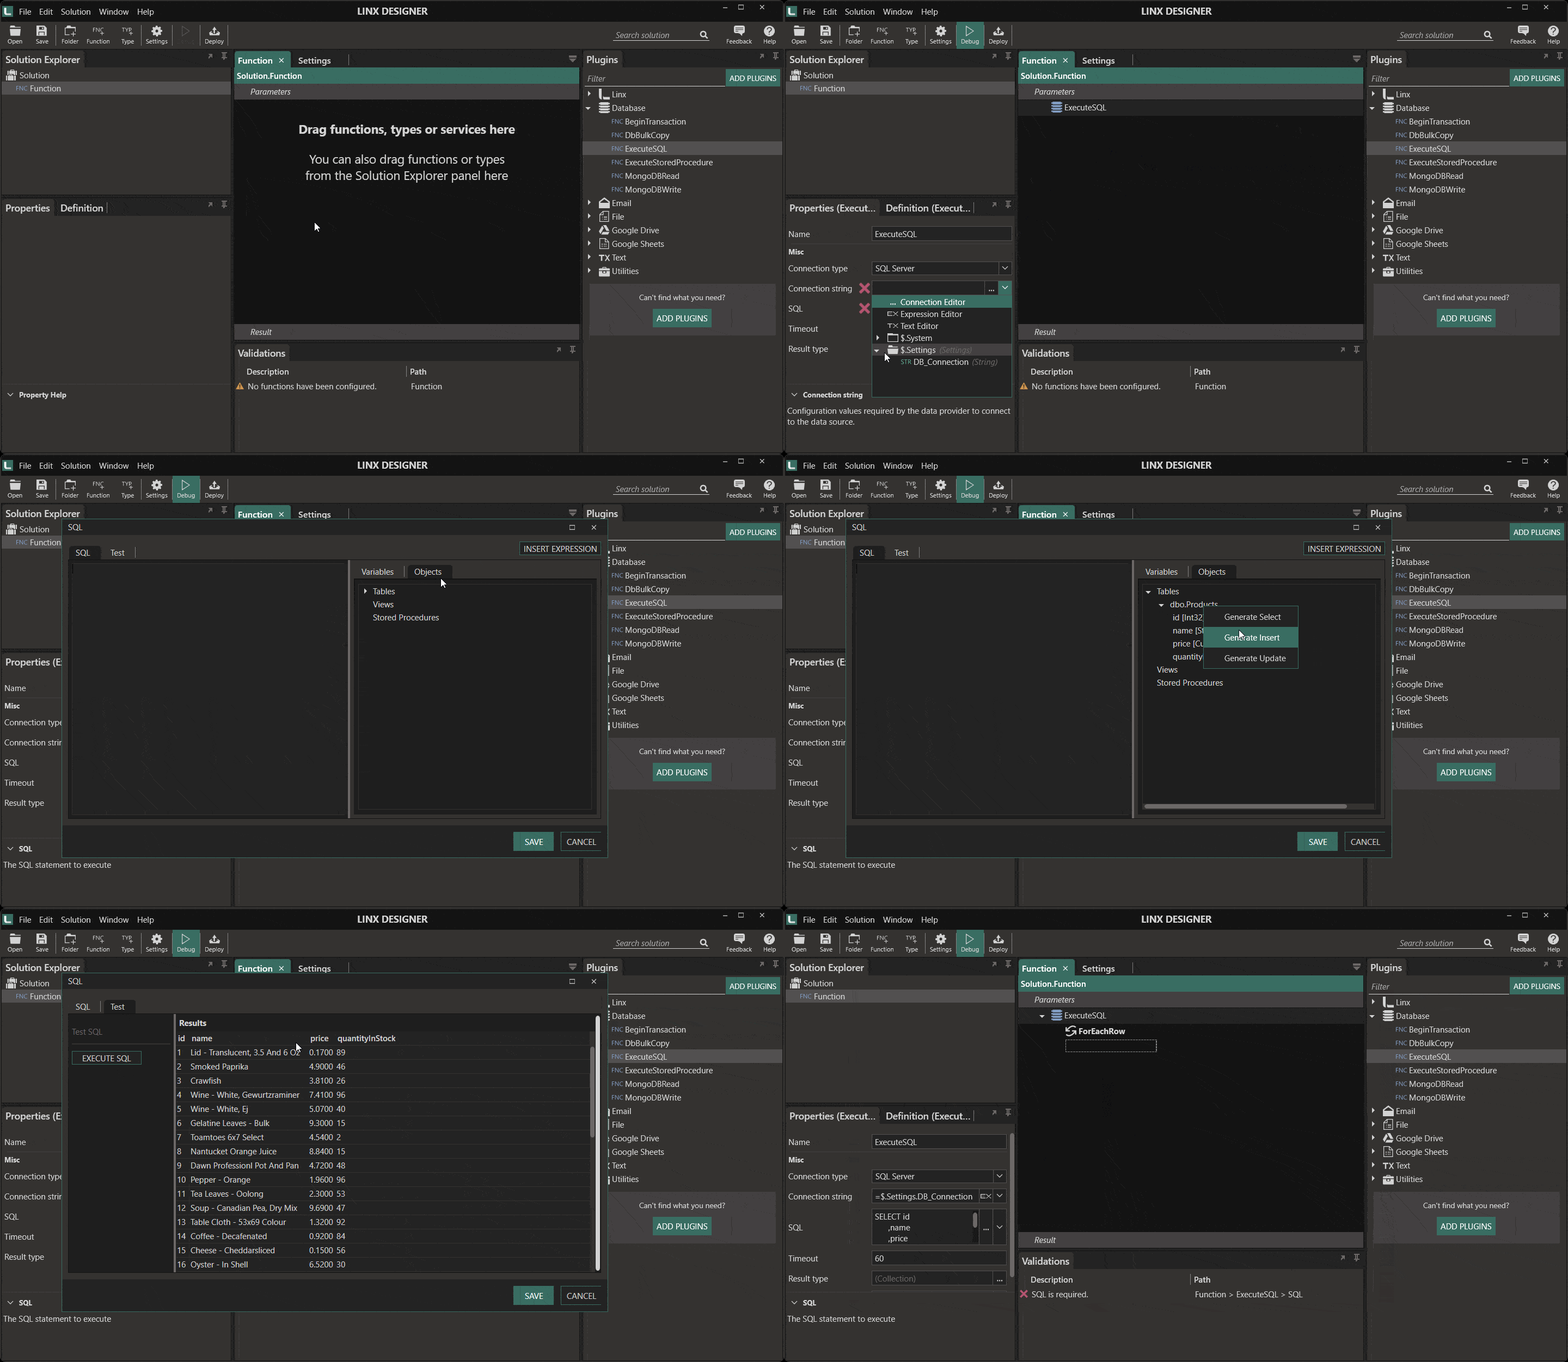
This works especially well in scenarios where you cannot retrieve and interact with data of a specific system in any other way. This approach will typically be followed for bespoke systems that do not have APIs, legacy systems or centralised data stores.
Read more on interacting with databases: Easily connect and interact with databases
