APIs are created so that users can use them as a bridge to connect to applications and services. Thousands of APIs are available for consumption, and each API is unique. But it’s really easy to consume APIs to extend the capabilities of your Linx solutions, even complex ones that require OAuth 2.0 tokens. Let us show you how with a real-life example.
Steps to Consume and API
- Find the API you want to use. APIs can be categorized as Open APIs, Partner APIs or Private APIs. Open APIs are available to the public, whereas Partner APIs are offered to business partners (no public access). Private APIs are designed for internal use.
- Request access to consume the API. Each API service has its authorization method. To grant access to use an API, credentials are provided to users for use.
- View the API reference documentation or guidelines on how to consume the API. The API documentation will provide endpoints with their respective details, including
– The URL (endpoint) of the operation
– Request authentication
– Request parameters (such as query values, body etc.)
– Response data object.
We’ve used the pet store API sample hosted at https://petstore3.swagger.io as an example to show you how Linx can be used to consume APIs from a REST Service.
Try it! Download the Petstore sample solution
How to Call a REST Service in Linx
In the following example, we’ll call the method findByStatus. We’ll break it down into 4 parts as above.
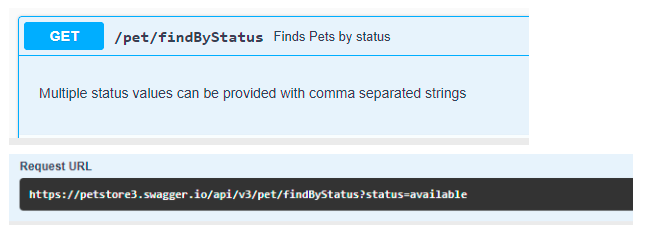
1. The URL (endpoint) of the operation

2. Request Authentication. For this test, the default api-key ‘special-key’ was used.
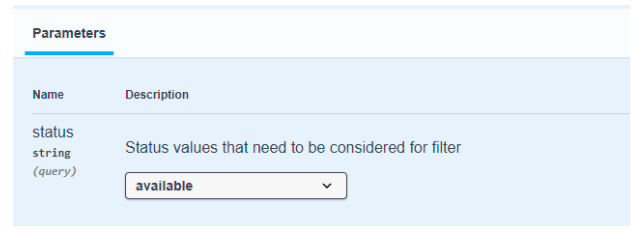
3. Request parameters

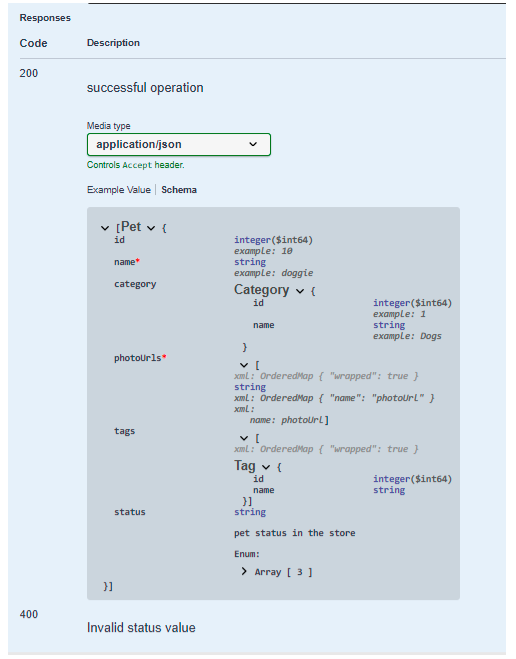
4. Response Data Object

Build!
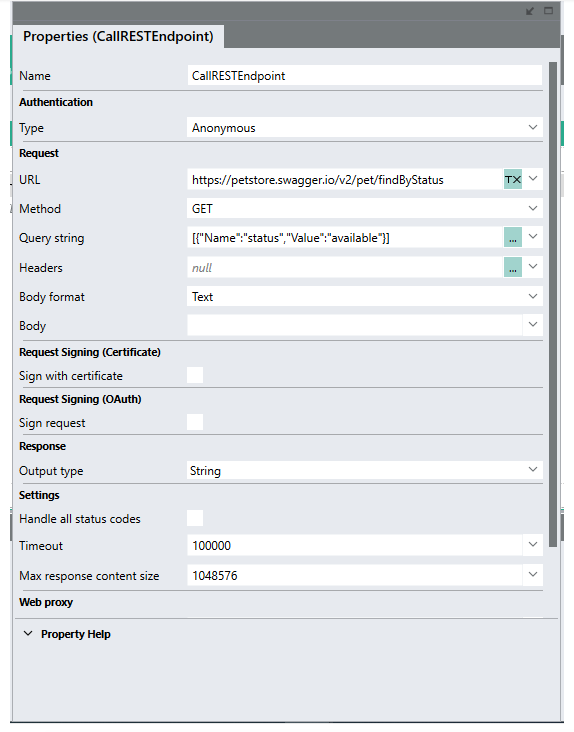
Once you have gathered all the information, you can build the app to consume the above endpoint. Linx provides an easy way to consume REST APIs using the CallRESTEndpoint Plugin
- Drag and drop the CallRESTEndpoint on the designer canvas.
- Choose the Authentication type.
- Fill in the information about the URL.
- Choose Method.
- If the REST API you are consuming requires specific headers or uses HTTP Authentication, fill in the necessary information.
- Fill in the information about the Body. If you choose JSON as the body format, you can use the Custom Linx Type to build the JSON structure. Check the API documentation to get complete details for body fields.
- Choose the Response Output Type. Check the API documentation to get complete details for response fields.
Now you can start sending requests to the API. Run Linx in Debug Mode to test the API.

Further reading: Debugging a Linx Solution
Low-code API development guides
- Design-first: Build an API using an OpenAPI specification
- Code-first API builder: Use Linx for quick API implementation, including hosting and documentation
