This guide will take you through the steps to build and host an API using Linx. It will cover building a straightforward API to retrieve product data. You will be provided with the data, instructions for what tools to use, relevant scripts and all steps to get the API live. It will take about 20 to 30 minutes to complete all steps.
Design-first API? View our guide to build and host an API using an OpenAPI specification
Table of contents
- Setup: Setup the API Service
- Building: Add logic to the events
- Debugging: Ensure the events work
- Deployment: Get the API on a server
- Consuming: Call the API
Let’s get started…
Requirements
This guide will follow how to build an API that retrieves product information from a database and makes that data available as a JSON object. The API will have two endpoints:
- Get All products – This endpoint will retrieve all products in the database
- Get Product By ID – This endpoint will retrieve the relevant product record based on an ID that is passed in.
To follow this guide you will need:
- An installed version of the Linx Designer
- Access to a Linx Server (provided when downloading the Linx Designer)
Setup: Setup the API Service
Linx will be used to create and host the API. As part of Linx, there is a REST plugin that allows you to host and consume REST APIs. You will create an API using the Simple REST Host service. This service will allow you to create an API via the Linx API wizard.
1. In the Linx Designer, create a new solution. Add the REST plugin by clicking on the ‘ADD PLUGINS’ button within the Plugins Panel.

2. Add a SimpleRESTHost service to your solution by dragging the SimpleRESTHost component from the Plugins tab, onto the central canvas. If you do not see the RESTHost component expand the REST plugin by clicking on the arrow button.

3. Set the Base URI property (under the API definition property) to http://localhost:5000. Save the Solution.
4. To create the events that will act as endpoints, you first need to make the custom type that will be returned. This custom type will be returned as a JSON object when the endpoint is called. To create this custom type click on the Solution ribbon, and click on the Import Type option.

Paste the below JSON into the dialogue box. Name the type Product then click the create button

5. You can now create the events that will function as the endpoints of the API. Select the SimpleRESTHost, then click on the ellipses next to the Operations setting.
6. To create the GetAllProcucts event do the following:
I. A default operation will exist in the operation list. Change the name to GetAllProcucts
ii. Set the path to be /products
iii. Set the response body to be a list of the Product type that was created in step 3. To do this click on the dropdown on the response body, select List, then click on the edit button and select Product under the solution section.

7. To create the GetProductByID event do the following
i. On the operation wizard, click on the ADD OPERATION Button
ii. Set the name to GetProductByID
iii. Set the path to be /productByID
iv. Create a Query String parameter by clicking on the ellipses and then adding in an id parameter as a string
v. Set the response body to the Product type that was created.
vi. Save the operations

Once successfully saved you will see the operations created under the SimpleRESTHost. The next part will focus on adding logic to retrieve the data from a database so that it can be returned as a response when the endpoints are called.

Building: Add logic to the events
In this section, you will add logic to events so that each endpoint will return the expected data once called.
8. For the getAllProducts event:
i. Add the Database Plugin from the Plugins panel.
ii. Select the GetAllProducts event by clicking on it.
iii. Add an ExecuteSQL function by dragging the ExecuteSQL function from the Plugins panel onto the central canvas: Create
iv. Create a new setting for the database connection string. A setting can be created by clicking on the Settings icon and then adding the new setting to the grid. Call the setting DB_Connection and set its value to:
You can use your own database. Ensure to add the connection string as per above.
v. Set the connection string in the ExecuteSQL function to be the DB_Connection setting created above. It will then contain the value: $.Settings.DB_Connection
vi. Add the SQL below to that ExecuteSQL function:

Test the SQL script by clicking on the Test tab on the SQL box and executing the SQL. If successful you will be presented with a set of results.
vii. Set the return options of the ExecuteSQL function to ‘List of rows’

viii. Add a Return function to the event underneath the ExecuteSQL function.

ix. For the Value of the Return function, click on the edit button, then in the ResponseBody section, select ‘ExecuteSQL’ (the result of the SQL query from the function)

9. For the GetProductByID event:
i. Add an ExecuteSQL function
ii. Set the connection to be the DB_Connection setting created above (in step 13). It will look something like this: $.Settings.DB_Connection
iii. Add the SQL below to that ExecuteSQL function:
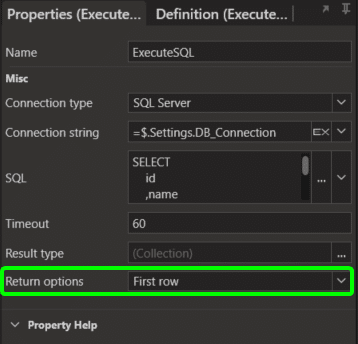
iv. Set the return option of the ExecuteSQL function to only return the ‘First row’.

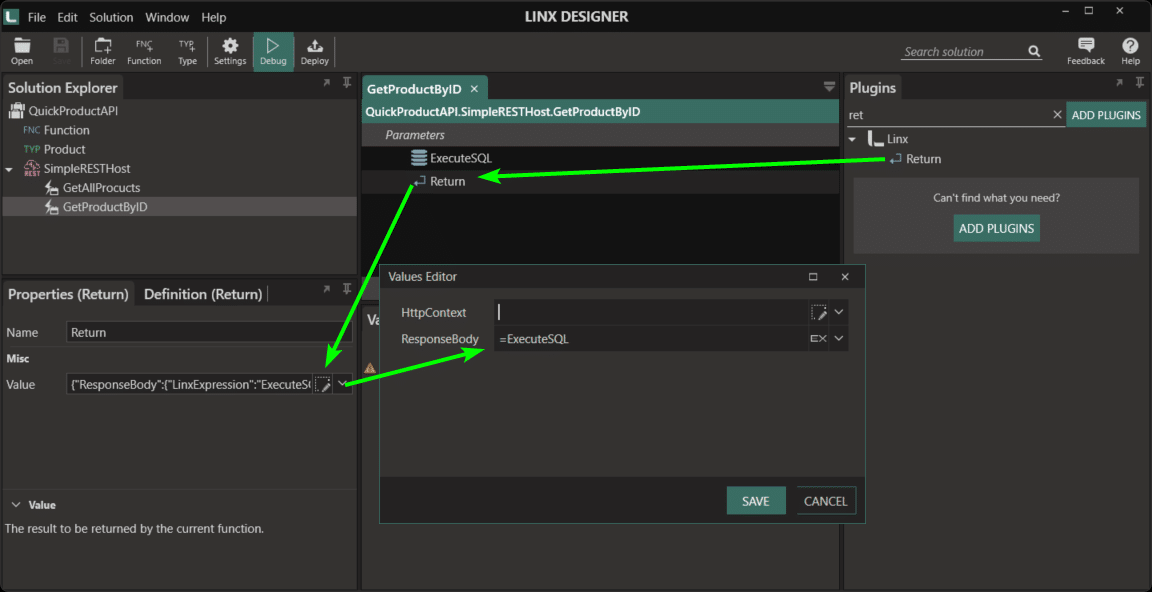
v. Add a Return function to the event that will set the response body to the ExecuteSQL result. To do this, click on the edit button for the Value, then in the ResponseBody section, select ‘ExecuteSQL’ (the result of the SQL query from the function)

vi. Save the solution
Debugging: Ensure the events work
In this section you will debug the API to test it and ensure that it is working as expected.
10. Debug the Simple REST Host service. Do this by selecting the SimpleRESTHost, and then clicking on the Debug button. When the debugger is ready, click on the Start button. This will start the service in a locally hosted instance for testing. When done the debug output should have a message that reads: ‘SimpleRESTHost service started.’
11. Test the getAllProducts event. Do this by calling the below URL in any browser when the SimpleRESTHost service has started in debug mode:

Note that the response body is a JSON object list that contains all products in the database table.
12. Test the GetProductByID event. Do this by calling the below URL in any browser when the SimpleRESTHost service has started in debug mode:

Here you can see that the result is only the product with product id 1.
To stop debugging you can click on the Stop button and then click on the EXIT DEBUGGING button.
Deployment: Get the API on a server
Now that the API is functioning as expected, it can be deployed to a server where it will be hosted and monitored. In this section, you will deploy the API.
Before you can deploy the solution and call the API from the Linx Server, the BaseURI needs to be corrected to point to the servers URI:
13. In the Linx Designer, select the ProductAPI RESTHost service, change the BaseURI from ‘http://localhost:5000’ to ‘https://+:8080’
14. Set the API Documentation to be Swagger UI. This will allow the server to host Swagger UI documentation for our API.


16. Now that the API is developed and final changes are made, it is time to deploy it to a server where it will be hosted.
As part of your initial sign-up, you should have received login credentials for a trial Linx server via email. If you have not received these details, please contact support
About the Linx Server: The Server is a Windows Service that hosts and manages your Linx Solutions and web services. You can install Linx Server on the hardware of your choice (on-premise or cloud) with monitoring, metrics and logging as standard.
Further reading: Installing the Linx Server
- In the Linx Designer, click Deploy
- Set up the server using the credentials you have received
- Click the Save button
- Click the ‘DEPLOY & OPEN SERVER’
- The solution will be deployed and the server will be opened once the solution is deployed to the server.

These steps will only have to be taken the first time when setting up the server. After the server is set up with the Linx Designer, you can deploy by simply clicking on the ‘DEPLOY & OPEN SERVER’ button. You can also use the ‘DEPLOY’ button if you already have the server open.
17. When you open the Server, and the solution is uploaded and ready to use, it should look like this:

18. Click on the ProductAPI Solution, and then turn the RestHost service on:

19. Swagger documentation is hosted on the server and is accessible via any browser. You can access this by accessing the hosted API URL. The Hosted API URL is your server name ‘[my-domain].api.linx.twenty57.net‘. Add ‘/swagger’ to access the swagger documentation. The address will look similar to this:
See the Swagger documentation hosted on the Linx server:

Consuming: Call the API
In this section, you will test the hosted API. This can be done by using any API testing tool such as Postman, hoppscotch.io or even a web browser.
To call the API, the Linx Server is set up in such a way that your API is hosted at your server name ‘[my-domain].api.linx.twenty57.net‘. Add the endpoint paths behind this hosted address to call the endpoint.
20. Test getAllProducts. Do this by calling the below URL modified with your server name (replace the xxxxxx11 with your server name) in any browser (or testing tool):

21. Test GetProductByID. Do this by calling the below URL modified with your server name (replace the xxxxxx11 with your server name) in any browser (or testing tool):


You can now head back over to the Linx server to view the monitoring and logging of events.
23. Open the solution to view the events and errors in the dashboard:

24. To view errors, click on the red indicator on the dashboard:


- Developed an API and tested it via real-time debugging
- Deployed the API to a server where it is hosted
- Viewed hosted API documentation
- Tested the deployed API
Now it is time to start building your own API.
Prebuilt Integration samples and templates
